Tuesday, January 20, 2015

Gogo Progress: Tanto

Despite the massive amount of screenglare today, I ventured outside to pick up a new roll of worbla from the awesome guys at Tap Plastics! Seriously, if you're in the area, I highly recommend swinging by. They're friendly, supportive and really helpful.
Ran past Lowes on the way home to pick up a few more supplies and then got to work on the scabbard and haft of Gogo's tanto.
I fitted a thin sheet of EVA foam around the tanto blade I'd already made (see the blog post titled New Project = New Pictures) and cut it so it would fit snugly. Then I used contact cement to fuse the seams of the foam sheet and slid the blade in to make sure it would fit.
I traced the bottom of the foam sheath on a smaller piece of EVA, cut it out and glued it to the end to create a cap. My cutting skills are far from perfect, so I sanded it down a bit with some 80 and then 320 grit sandpaper.
Using the same process as fitting the foam to the blade, I coated the EVA with worbla and then trimmed it and lightly pressed down the seam. I haven't read much about sanding down worbla before it's been primed. This, I assume, is mostly because worbla is heat-reactive and sanding=friction=heat. That could end up a pretty gooey mess. But I tried it anyway, starting with 40 grit and working my way back up to 320. It looks a little chalky in the photo, but I was pleasantly surprised by how well it worked out. It really smoothed out the seam! Please ignore the random styrofoam ball in the picture. I was experimenting.


After the seam was sanded down to my satisfaction, I took some extra worbla scraps (as always, SAVE ALL THE WORBLA!) and molded the kurigata (sheath's loop-thing) and pressed it onto the scabbard. While it was cooling, I cut out a rough piece of EVA foam for the tsuba (handguard) and fitted it haphazardly onto the handle of the blade. I also elongated the handle a little with another square of worbla-coated wood after I realized it looked a little too short.

I'm guessing anyone looking at step-by-step cosplay progress will have come across many more well-known cosplayers and their instructions for how to sandwich foam and worbla, but I'll put it down here on the off chance anyway.
Two pieces of worbla, both glossy side up. Foam in between. Heat them up, line them up, sandwich the foam, cut the worbla where you want the piece to end, and use a needle to puncture any air bubbles. If you do get air bubbles, press them from the outside of the bubble in toward the needle-hole.
Ta da!

Gogo Progress: Chain Mace

Since my last post, I've trimmed the top loop of the mace. I re-heated the worbla and created the indentations, made the worbla spikes, and have begun layering the Gesso. Here are the pictures!
Trimmed top:
Indentations (made with the flat end of a pair of scissors and a thin leather cord)
Spikes! I set the mace down sideways on a sheet of foam and it punctured straight through to the carpet. These things are sharp!

First layer of Gesso. Gonna have to take this bit in small steps.
I stopped by Lowes and picked up two types of chain for the final steps.

Thanks for checking it out!

Sunday, January 11, 2015

New project = New pictures!

I wanted to post a few pictures of the cosplay I'm currently working on: Gogo Yubari from Kill Bill. I can't remember exactly when I decided I wanted to try my hand at this particular cosplay, but I'm having fun with it. It's different working with cloth (albeit scavenged pre-made clothing pieces so far) and I think I'm getting a little less scared of worbla. For a while I didn't even want to use it for fear of wasting such an expensive material :/
Anyway, on to the pictures. I've searched high and low for a proper plaid skirt, but it turned out to be much more elusive than I'd expected. I have enough problems finding clothing that fits right, so I didn't order one online. If everything goes well, I'm going to try my hand at altering the skirt later on. And for those of you who might be thinking "She's not even sewing any of this??" please trust me when I say I'm abysmal with a sewing machine and I'm trying. For now, though, (and because I have a deadline with this project) I'll be using purchased pieces from Goodwill, etc. Enough jabbering. On to the pictures!
The wig. First time ever using one. I didn't put my hair up, so the wig looks a tad big.
Working on the makeup. Sorry about the bad quality!

(The bow is temporary. Didn't have a wide enough one at the time.)
Started off with a flat piece of wood for the tanto blade and whittled away at it til it was the shape I wanted.

Wooden blade all covered in worbla :)

I used a styrofoam sphere from the craft store for the base of the chain mace, then folded a few sheets of paper towel and hot glued the sheets around the circumference.
Set up a layer of worbla around the paper towel and screwed in a hook and a rectangle ring, which I then secured with hot glue.
Mace base with a foam ring at the top, waiting to be trimmed. It's in the ugly-Christmas-ornament stage.
Lastly, my attempt at the cord binding for the tanto hilt. I just practiced on an extra piece of wood.
Thanks for checking out the blog! I promise I will eventually get better at all this. Right now I think I'm just running on mad enthusiasm as opposed to skill.

Friday, January 9, 2015

To cap it all off...

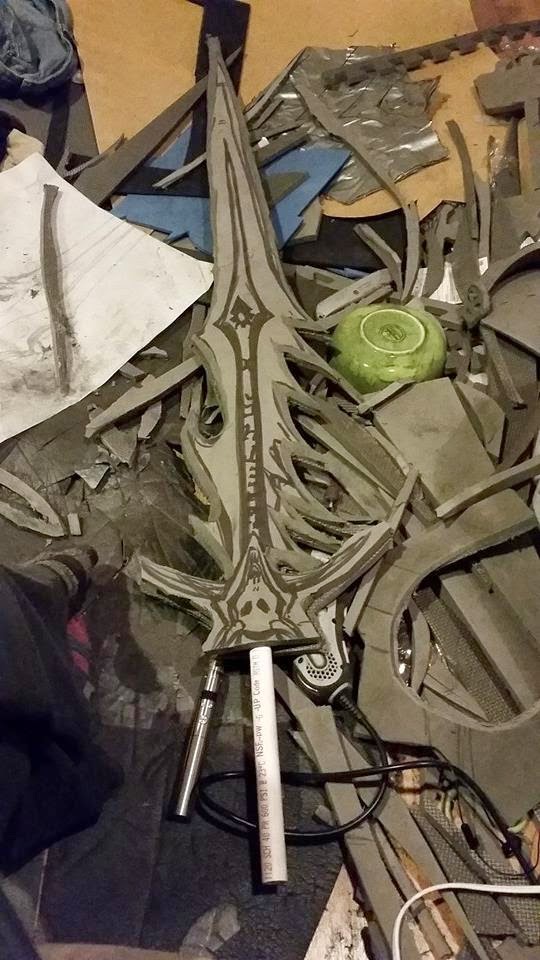
 I realize I never continued my lengthy rant on the step-by-step progress of my Lich King cosplay, but I'm caught up in a busy job and other projects that I want to start posting about. Therefore, I'll just post the rest of my pictures here and if anyone decides to comment with a question about any of the steps I'll be more than happy to go into further detail.  (If anyone is reading this. Are you out there, internet people? o.o)
I shaped the pieces with a Dremel, used contact adhesive cement to piece things together, laid on the Gesso, sanded it, then spray painted it and hand-painted and aged it with acrylic. That's about it! Thanks for checking it out and sorry about the lack of professional shots of the full armor.


Wednesday, November 19, 2014

The trial-by-fire DIY-er

Thus begins the recount of the three weeks before Halloween.

The first of the three weeks was spent on research. Cosplay 101. The basics. How-to guides.
Week two was spent gathering the supplies I thought I'd need, experimenting with those supplies, building the base of the helm,  and sneezing over sample strips of faux fur.

It was about halfway through this week that I discovered the unparalleled usefulness of the Dremel. And that's when I really got to work.
Troubleshooting the helm took about a week in itself. Working a 40-hour job with a potential for overtime isn't always the best companion for projects with a time limit.
I started with a foam head model from the local crafts store and luckily the head measurements were nearly identical to my own. From there I followed a tutorial I'd found on YouTube. It was immensely helpful and I'm forever grateful to the owner, Evil Ted Smith. You can find the link to Part 1 here. I HIGHLY recommend it if you're looking for something concise and both visually and verbally instructive. The helm consists almost entirely of EVA foam garage mats (the grey puzzle-pieced stuff in the second picture) and is held together with contact adhesive wood cement. You can see the big seam down the scalp where I didn't let it dry enough and it began resisting me when I was lining it up.


The helm went through stages. I like to label the four main stages as Magneto, the ear-less Cat Woman, Beth'tilac, and finally Arthas. Those are mostly self explanatory,  but for those of you who don't know,  Beth'tilac is a spider in the Cataclysm raid Firelands. She's got these big bulky pincers and before trimming and shaping the faceguard, that's all I could see.  Big,  ridged pincers.
Magneto:


Cat Woman:


Beth'tilac pincers!


And a more recognizable Arthas-shape:

I had more trouble with the helmet than with any other part of the costume. Part of this stemmed from the fact that,  aside from Frostmourne,  the Lich King's helm is the most recognizable and iconic piece of gear. I felt the need to get it as close to the real thing as I could. And the other contributing factor was that I was under the illusion that I had some inexplicably infinite well of time.

This resulted in a carefully created helm that, while made by rather inexperienced hands, turned out pretty well all things considered. It also resulted in a frenzied all-nighter as I tried to put together nearly everything else (bar the breastplate) before work the next morning. And while I think I did okay on the paint job, the panicked speed at which I was working definitely shows in the end result in regards to the rest of those last-minute pieces of armor. (By the way, I used googly eyes for the rivets, as you'll notice on the back of the helm. I got this tip from another YouTuber, DemonWeasel1990 in his EVA foam video, which you can find here.)
The completed helm:


And finally, the completed and PAINTED helmet!