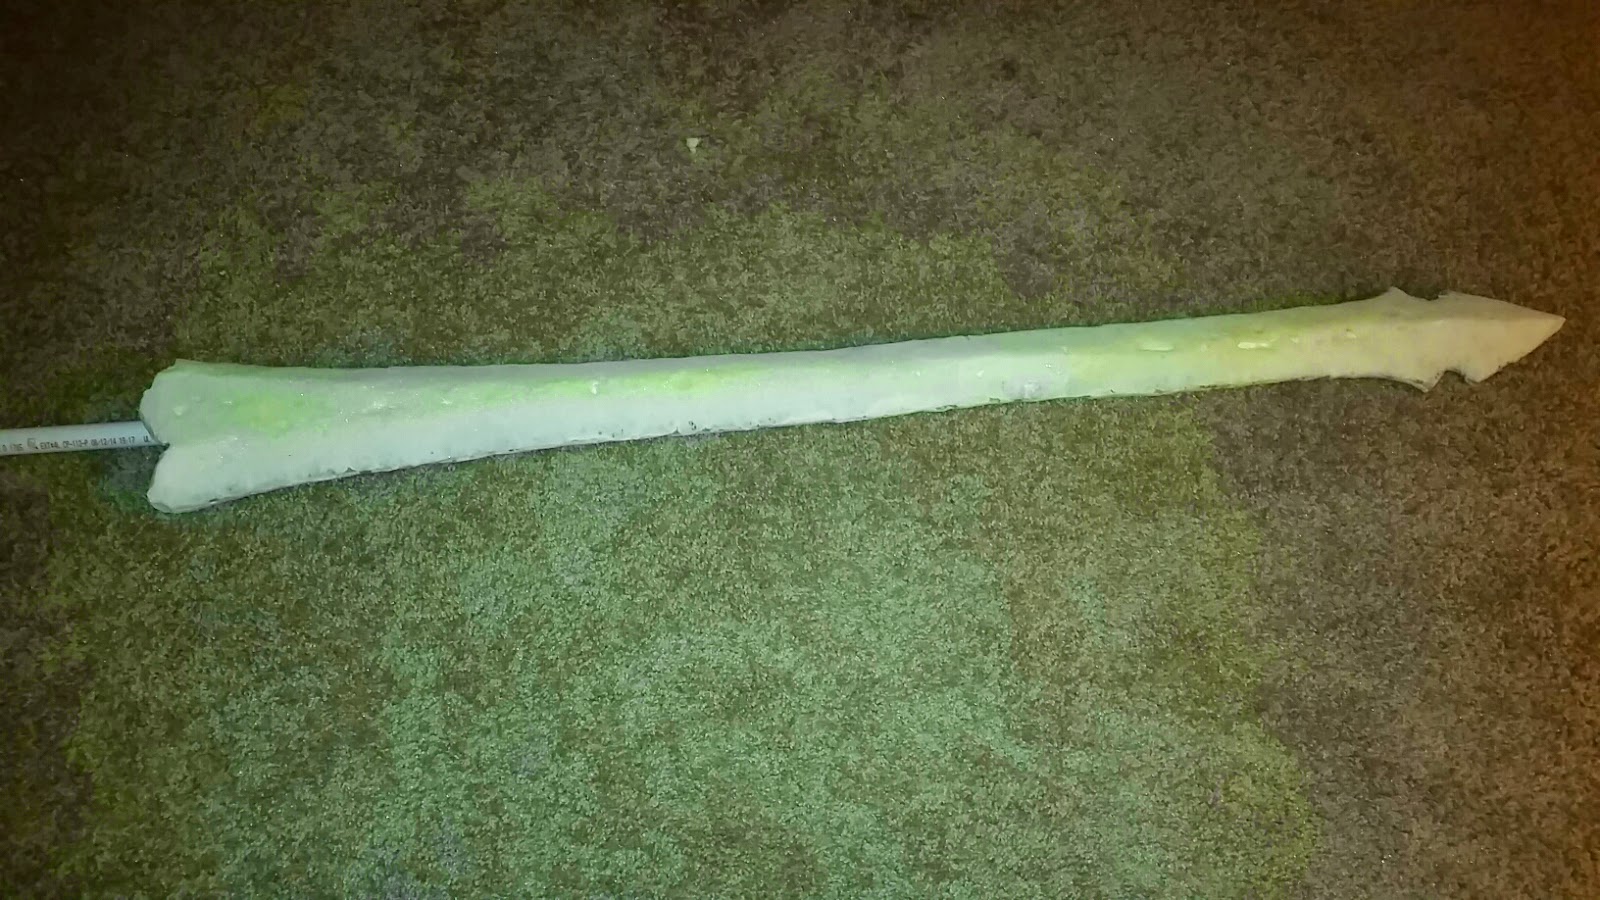
Rebellion's blade has been coated in foam and I've finally finished carving it down to size. It's a big sword, but I'm loving how light it is so far!
I was a little apprehensive about cutting away at it at first but, despite the fact that my rug has developed goliath dandruff, I found the process to be a great exercise in stress relief. Is that weird? Probably. But it was kind of nice coming home from a long day at work and taking out a little frustration while knowing I was being productive. This is what the blade looked like when I finally got it down to a thickness I was happy with:
Rebellion tapers from a seam in the middle of the blade straight down the sides without multiple... layers of beveled edges I guess. I'm not well versed in swordmaking terminology. What I mean to say is that the center of the blade is the highest point and it slopes down to the sharpened edges instead of being predominantly flat and then sloping sharply down at the edges of the sword. I hope I didn't totally mangle that explanation.
I started shaving the sides off to recreate the desired look, and that part actually did make me nervous. I was afraid I was going to shave too much off and be left with an uneven surface. Once I got as close to symmetrical as I could, I took some medium-grit sandpaper and rubbed down the sides of the blade. It really smoothed them out, although I would definitely recommend wearing a mask if you do this. Little foam particles do get everywhere.
Here is the blade so far. I got it from two different angles in the hope that you'd be able to see the defined edges.
I'm going to be working on the hilt soon, so I'll update then. Thanks for reading!
Showing posts with label sword. Show all posts
Wednesday, February 25, 2015
Tuesday, February 24, 2015
DMC Dante Cosplay Progress
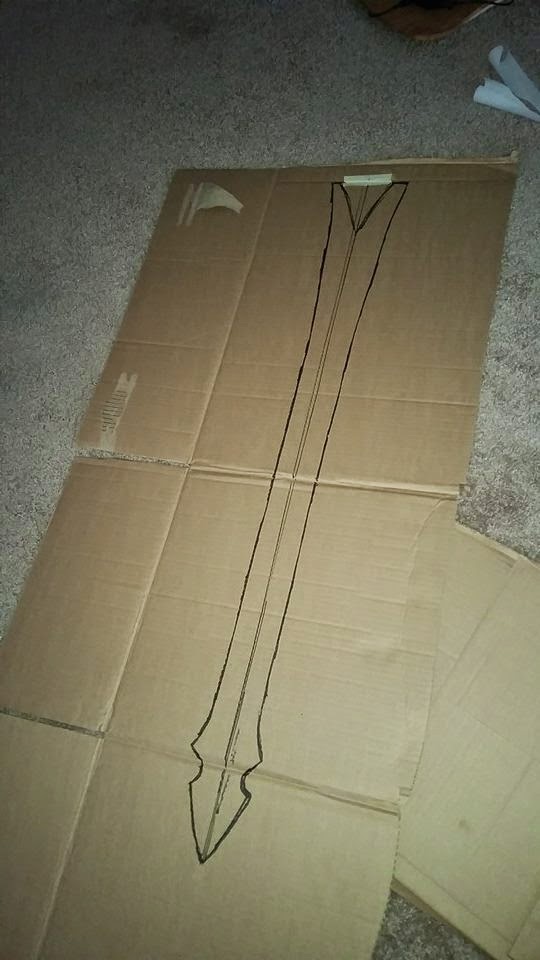
I started working on Rebellion this weekend. It's my first time working with expanding foam, so I'm sure I'll make a bunch of mistakes, but it's exciting to be working with another material. So far, I've sketched up a template on parchment paper, transferred it to cardboard, cut out the notch down the middle for the pvc pipe core and hot-glued the core into place. I only bought one can of expanding foam at the store (Great Stuff brand) and didn't realize or really think about how much I'd need. Turns out there was just enough to cover 3/4ths of the blade in one layer, so I guess I'll be making another trip to the hardware store.
I'm still thinking of ways to create the skeleton part of the hilt. Anyone have suggestions?
Til next time and thanks for reading!
I'm still thinking of ways to create the skeleton part of the hilt. Anyone have suggestions?
Til next time and thanks for reading!
Wednesday, February 18, 2015
Gogo's Mace Completed!
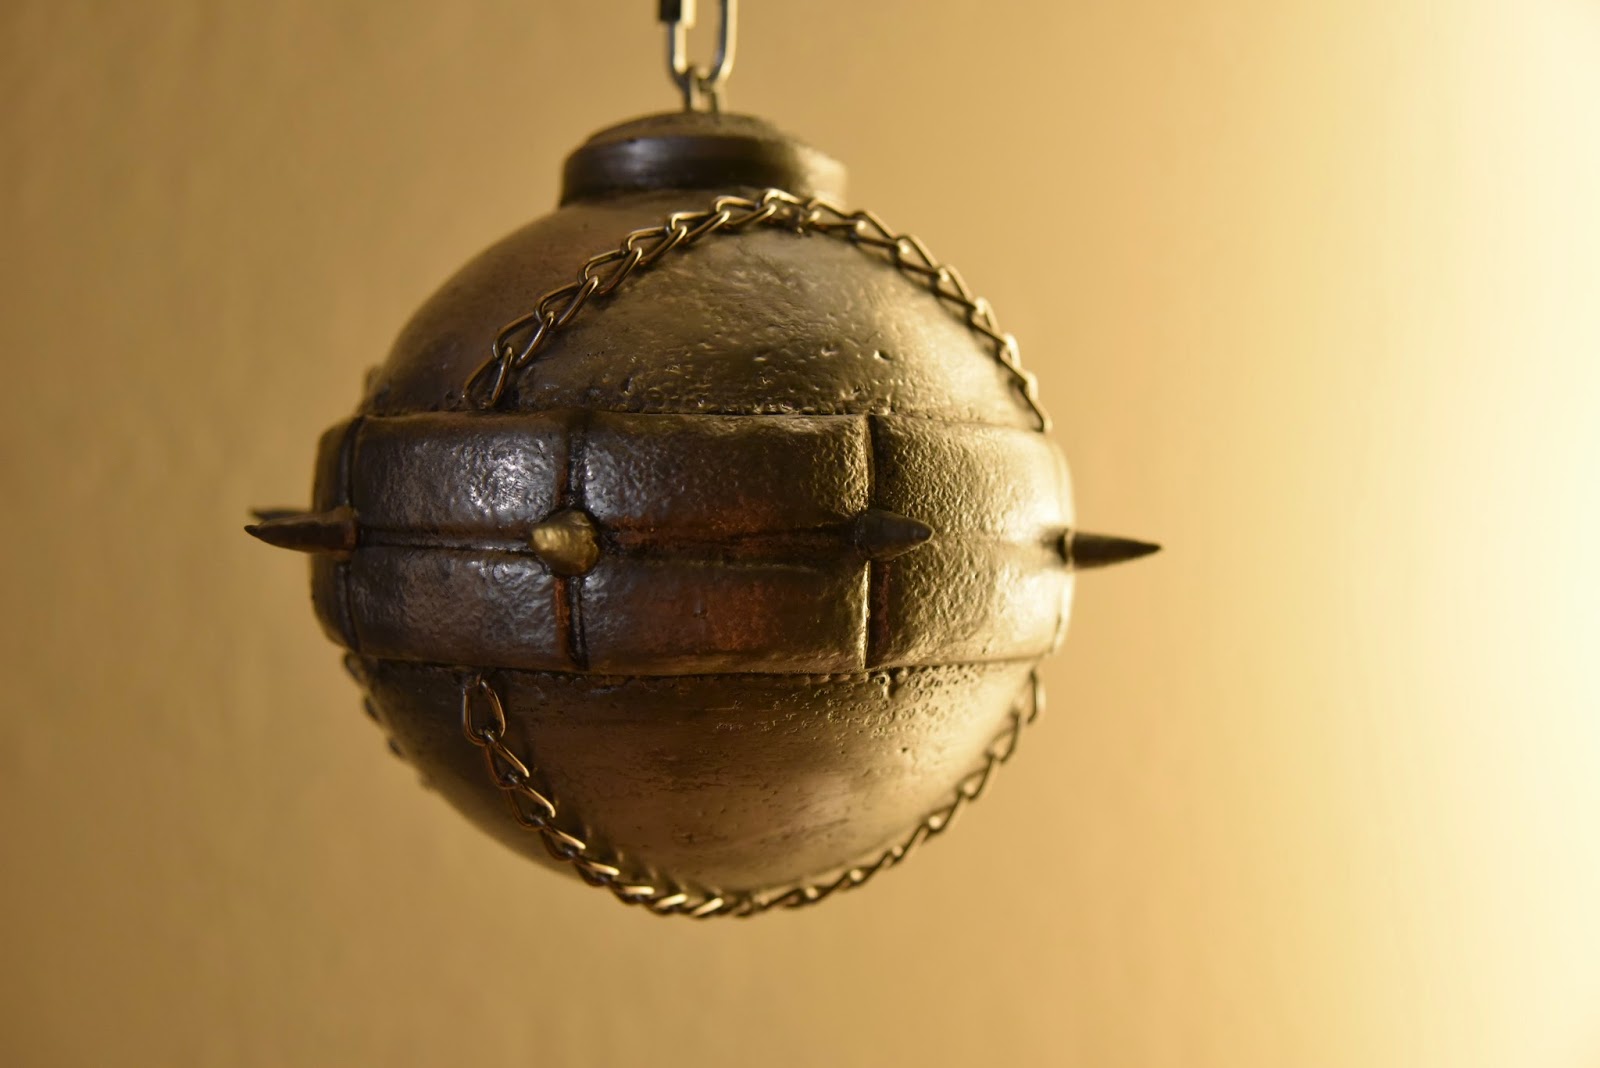
I finally finished Gogo's chain mace today! I'm so excited to post the pictures and I love seeing it hanging on the back of my door. Can't wait for the full costume to come together!
If you've got time, please leave me a comment and tell me what you think. Thanks for checking out the blog!
Wednesday, January 28, 2015
Tanto Progress Part 2
Hey there, nonexistent readers! Nah, I know the blog's new and pretty nondescript so far.
Anyway, I've got a few pictures to post on the sword progress, so I figured I'd share them now! Still waiting for the final layers of acrylic to dry on the scabbard before I get to work figuring out the sageo knot and beads and stuff. First, here's my mace all coated in Gesso and my tanto all coated in PlastiDip
I colored the blade using Rub'n'Buff and polished away at it until I was happy with the finish.
I coated the scabbard in red PlastiDip (which is darker and more vibrant than it appears here -- blame my phone's camera flash) and let it dry, then flipped, sprayed and waited some more. I'm actually really happy with the way it turned out!
As I said, I'm waiting for the acrylic on the scabbard to dry. I want it to have a finished, lacquered look before starting on the decorations. If you have a minute, I'd love some feedback or a shout to see if anyone is actually reading this. Have a nice midnight/morning/second breakfast, y'all!
Anyway, I've got a few pictures to post on the sword progress, so I figured I'd share them now! Still waiting for the final layers of acrylic to dry on the scabbard before I get to work figuring out the sageo knot and beads and stuff. First, here's my mace all coated in Gesso and my tanto all coated in PlastiDip
I coated the scabbard in red PlastiDip (which is darker and more vibrant than it appears here -- blame my phone's camera flash) and let it dry, then flipped, sprayed and waited some more. I'm actually really happy with the way it turned out!
As I said, I'm waiting for the acrylic on the scabbard to dry. I want it to have a finished, lacquered look before starting on the decorations. If you have a minute, I'd love some feedback or a shout to see if anyone is actually reading this. Have a nice midnight/morning/second breakfast, y'all!
Tuesday, January 20, 2015
Gogo Progress: Tanto
Despite the massive amount of screenglare today, I ventured outside to pick up a new roll of worbla from the awesome guys at Tap Plastics! Seriously, if you're in the area, I highly recommend swinging by. They're friendly, supportive and really helpful.
Ran past Lowes on the way home to pick up a few more supplies and then got to work on the scabbard and haft of Gogo's tanto.
I fitted a thin sheet of EVA foam around the tanto blade I'd already made (see the blog post titled New Project = New Pictures) and cut it so it would fit snugly. Then I used contact cement to fuse the seams of the foam sheet and slid the blade in to make sure it would fit.
I traced the bottom of the foam sheath on a smaller piece of EVA, cut it out and glued it to the end to create a cap. My cutting skills are far from perfect, so I sanded it down a bit with some 80 and then 320 grit sandpaper.
Using the same process as fitting the foam to the blade, I coated the EVA with worbla and then trimmed it and lightly pressed down the seam. I haven't read much about sanding down worbla before it's been primed. This, I assume, is mostly because worbla is heat-reactive and sanding=friction=heat. That could end up a pretty gooey mess. But I tried it anyway, starting with 40 grit and working my way back up to 320. It looks a little chalky in the photo, but I was pleasantly surprised by how well it worked out. It really smoothed out the seam! Please ignore the random styrofoam ball in the picture. I was experimenting.
After the seam was sanded down to my satisfaction, I took some extra worbla scraps (as always, SAVE ALL THE WORBLA!) and molded the kurigata (sheath's loop-thing) and pressed it onto the scabbard. While it was cooling, I cut out a rough piece of EVA foam for the tsuba (handguard) and fitted it haphazardly onto the handle of the blade. I also elongated the handle a little with another square of worbla-coated wood after I realized it looked a little too short.
I'm guessing anyone looking at step-by-step cosplay progress will have come across many more well-known cosplayers and their instructions for how to sandwich foam and worbla, but I'll put it down here on the off chance anyway.
Two pieces of worbla, both glossy side up. Foam in between. Heat them up, line them up, sandwich the foam, cut the worbla where you want the piece to end, and use a needle to puncture any air bubbles. If you do get air bubbles, press them from the outside of the bubble in toward the needle-hole.
Ta da!
Ran past Lowes on the way home to pick up a few more supplies and then got to work on the scabbard and haft of Gogo's tanto.
I fitted a thin sheet of EVA foam around the tanto blade I'd already made (see the blog post titled New Project = New Pictures) and cut it so it would fit snugly. Then I used contact cement to fuse the seams of the foam sheet and slid the blade in to make sure it would fit.
I traced the bottom of the foam sheath on a smaller piece of EVA, cut it out and glued it to the end to create a cap. My cutting skills are far from perfect, so I sanded it down a bit with some 80 and then 320 grit sandpaper.
Using the same process as fitting the foam to the blade, I coated the EVA with worbla and then trimmed it and lightly pressed down the seam. I haven't read much about sanding down worbla before it's been primed. This, I assume, is mostly because worbla is heat-reactive and sanding=friction=heat. That could end up a pretty gooey mess. But I tried it anyway, starting with 40 grit and working my way back up to 320. It looks a little chalky in the photo, but I was pleasantly surprised by how well it worked out. It really smoothed out the seam! Please ignore the random styrofoam ball in the picture. I was experimenting.
I'm guessing anyone looking at step-by-step cosplay progress will have come across many more well-known cosplayers and their instructions for how to sandwich foam and worbla, but I'll put it down here on the off chance anyway.
Two pieces of worbla, both glossy side up. Foam in between. Heat them up, line them up, sandwich the foam, cut the worbla where you want the piece to end, and use a needle to puncture any air bubbles. If you do get air bubbles, press them from the outside of the bubble in toward the needle-hole.
Ta da!
Sunday, January 11, 2015
New project = New pictures!
I wanted to post a few pictures of the cosplay I'm currently working on: Gogo Yubari from Kill Bill. I can't remember exactly when I decided I wanted to try my hand at this particular cosplay, but I'm having fun with it. It's different working with cloth (albeit scavenged pre-made clothing pieces so far) and I think I'm getting a little less scared of worbla. For a while I didn't even want to use it for fear of wasting such an expensive material :/
Anyway, on to the pictures. I've searched high and low for a proper plaid skirt, but it turned out to be much more elusive than I'd expected. I have enough problems finding clothing that fits right, so I didn't order one online. If everything goes well, I'm going to try my hand at altering the skirt later on. And for those of you who might be thinking "She's not even sewing any of this??" please trust me when I say I'm abysmal with a sewing machine and I'm trying. For now, though, (and because I have a deadline with this project) I'll be using purchased pieces from Goodwill, etc. Enough jabbering. On to the pictures!
The wig. First time ever using one. I didn't put my hair up, so the wig looks a tad big.
Working on the makeup. Sorry about the bad quality!
(The bow is temporary. Didn't have a wide enough one at the time.)
Started off with a flat piece of wood for the tanto blade and whittled away at it til it was the shape I wanted.
Wooden blade all covered in worbla :)
I used a styrofoam sphere from the craft store for the base of the chain mace, then folded a few sheets of paper towel and hot glued the sheets around the circumference.
Set up a layer of worbla around the paper towel and screwed in a hook and a rectangle ring, which I then secured with hot glue.
Mace base with a foam ring at the top, waiting to be trimmed. It's in the ugly-Christmas-ornament stage.
Lastly, my attempt at the cord binding for the tanto hilt. I just practiced on an extra piece of wood.
Thanks for checking out the blog! I promise I will eventually get better at all this. Right now I think I'm just running on mad enthusiasm as opposed to skill.
Anyway, on to the pictures. I've searched high and low for a proper plaid skirt, but it turned out to be much more elusive than I'd expected. I have enough problems finding clothing that fits right, so I didn't order one online. If everything goes well, I'm going to try my hand at altering the skirt later on. And for those of you who might be thinking "She's not even sewing any of this??" please trust me when I say I'm abysmal with a sewing machine and I'm trying. For now, though, (and because I have a deadline with this project) I'll be using purchased pieces from Goodwill, etc. Enough jabbering. On to the pictures!
The wig. First time ever using one. I didn't put my hair up, so the wig looks a tad big.
Working on the makeup. Sorry about the bad quality!
(The bow is temporary. Didn't have a wide enough one at the time.)
Started off with a flat piece of wood for the tanto blade and whittled away at it til it was the shape I wanted.
Wooden blade all covered in worbla :)
I used a styrofoam sphere from the craft store for the base of the chain mace, then folded a few sheets of paper towel and hot glued the sheets around the circumference.
Set up a layer of worbla around the paper towel and screwed in a hook and a rectangle ring, which I then secured with hot glue.
Mace base with a foam ring at the top, waiting to be trimmed. It's in the ugly-Christmas-ornament stage.
Lastly, my attempt at the cord binding for the tanto hilt. I just practiced on an extra piece of wood.
Thanks for checking out the blog! I promise I will eventually get better at all this. Right now I think I'm just running on mad enthusiasm as opposed to skill.
Labels:
blade,
chain mace,
cosplay,
Gogo,
katana,
Kill Bill,
lethe designs cosplay,
spike ball,
styrofoam,
sword,
tanto,
worbla,
Yubari
Subscribe to:
Posts (Atom)