Tuesday, May 26, 2015

Devil May Cry - Ebony and Ivory Tutorial

Hey guys! This is just gonna be a semi-quick step-by-step tutorial on how I made Ebony and Ivory for my Dante crossplay. I'm gonna try to cut out most of the warbling I usually do. Trying to keep this relatively brief but still instructive. You can click on any of the pictures to zoom them in for full size. Here goes!

First off, this was my first experience constructing any type of gun and I had no idea how to go about it. I did a lot of Googling and the most useful link for me as a beginner was this one here. There were a few templates in the downbar that really gave me an idea of where to get started. I didn't print them out or trace them, but they were enough of a visual guide for me to freehand my own templates and I'd highly recommend checking out the link if this post doesn't provide enough info.


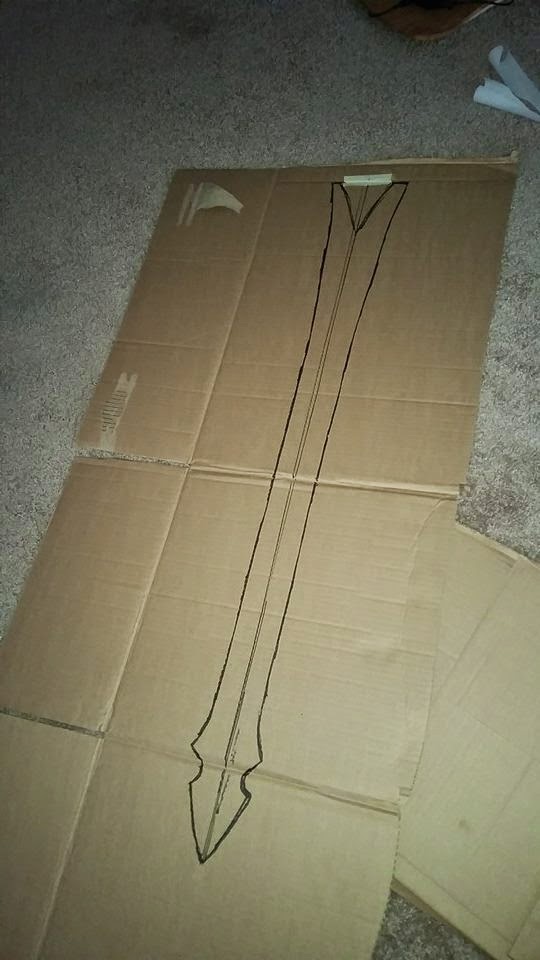
Here are my templates. I sketched them out using a roll of parchment paper so that I could see all the parts lined up, but I'd imagine regular paper would also work.


The guns are made almost entirely of layered foam poster board. I bought mine at Hobby Lobby for somewhere between 3 to 6 dollars and chose two different thicknesses: a half-inch thick board and a thinner one with an adhesive backing. The adhesive is optional and was unintentional on my part but turned out to be pretty useful because I didn't have to take the time to glue each individual layer together. I traced the templates out on the foam board and lined all the pieces up using the half-inch board for the innermost layer of each gun and the adhesive board for the rest.


The handle is covered in a thin layer of balsa wood (also from Hobby Lobby) which I glued on to either side.


I sketched out some detailing lines on either side which I later engraved using a thin etching tip and a Dremel. I also used a wider Dremel head to drill a hole in the tip of the gun for a slightly more realistic look. You can see the sketched lines on the unfinished gun versus the finished detailing here.


The cameos were just plastic buttons I bought from JoAnn Fabrics. I gouged an indent in the balsa wood where I wanted the loop of the button to fit and then glued them down with contact cement. I used a wood stain to darken the balsa. My guns took a bit of damage after two conventions in a row and so I'd recommend using a sealer of some sort to prolong prop life if these are being made as more than just decoration. Balsa wood is soft and kind of spongy and, as I discovered, chips and dents fairly easily if left unprotected.
The rivets in the guns are made using grommets which I assume are meant to be used for corsets and other lace-up garments. I just glued them down. They may fit securely without glue at first, but I lost a few of mine at ECCC throughout the course of the day.
I painted the cameos with acrylic paint and used a nail polish topcoat to seal them. I rubbed a little more black and brown acrylic over the buttons after they'd dried to give them a more weathered appearance.

Before and after weathering the cameo:


I used spray paint on Ivory and black PlastiDip on Ebony (make sure to put masking tape over your handguards before doing any painting, obviously) and didn't think to do much in the way of priming the edges.
In hindsight, I'd highly recommend using a sandable wood filler on all edges that expose the foam and then use a wood glue or something similar to seal it down after it's sanded and dried and before using any kind of spray paint or sealant on your props. The exposed foam reacts to aerosol by bubbling and melting down a little and it made the undersides of both weapons a little pockmarked looking.


And here are the finished guns! I hope this tutorial helps :) Thanks for reading!


Wednesday, February 25, 2015

Back with more expanding foam

Rebellion's blade has been coated in foam and I've finally finished carving it down to size. It's a big sword, but I'm loving how light it is so far!
I was a little apprehensive about cutting away at it at first but, despite the fact that my rug has developed goliath dandruff, I found the process to be a great exercise in stress relief. Is that weird? Probably. But it was kind of nice coming home from a long day at work and taking out a little frustration while knowing I was being productive. This is what the blade looked like when I finally got it down to a thickness I was happy with:

Rebellion tapers from a seam in the middle of the blade straight down the sides without multiple... layers of beveled edges I guess. I'm not well versed in swordmaking terminology. What I mean to say is that the center of the blade is the highest point and it slopes down to the sharpened edges instead of being predominantly flat and then sloping sharply down at the edges of the sword. I hope I didn't totally mangle that explanation.
I started shaving the sides off to recreate the desired look, and that part actually did make me nervous. I was afraid I was going to shave too much off and be left with an uneven surface. Once I got as close to symmetrical as I could, I took some medium-grit sandpaper and rubbed down the sides of the blade. It really smoothed them out, although I would definitely recommend wearing a mask if you do this. Little foam particles do get everywhere.
Here is the blade so far. I got it from two different angles in the hope that you'd be able to see the defined edges.

I'm going to be working on the hilt soon, so I'll update then. Thanks for reading!

Tuesday, February 24, 2015

DMC Dante Cosplay Progress

I started working on Rebellion this weekend. It's my first time working with expanding foam, so I'm sure I'll make a bunch of mistakes, but it's exciting to be working with another material. So far, I've sketched up a template on parchment paper, transferred it to cardboard, cut out the notch down the middle for the pvc pipe core and hot-glued the core into place. I only bought one can of expanding foam at the store (Great Stuff brand) and didn't realize or really think about how much I'd need. Turns out there was just enough to cover 3/4ths of the blade in one layer, so I guess I'll be making another trip to the hardware store.


I'm still thinking of ways to create the skeleton part of the hilt. Anyone have suggestions?
Til next time and thanks for reading!

Wednesday, February 18, 2015

Gogo's Mace Completed!

I finally finished Gogo's chain mace today! I'm so excited to post the pictures and I love seeing it hanging on the back of my door. Can't wait for the full costume to come together!
If you've got time, please leave me a comment and tell me what you think. Thanks for checking out the blog!


Tuesday, February 17, 2015

Elven Circlet painting and aging!

Hey guys! This is just going to be a picture-heavy follow-up on my previous post. Enjoy!


That elven light, amirite? :P


A recent side project

My apologies for the silence! I've been out for the past week, courtesy of a sinus infection that's knocked me on my ass. I'm starting to finally feel a bit better so I thought I'd post pictures of the side project I'm currently working on. A friend of mine is doing an elven ranger cosplay but couldn't find a circlet that fit the image in her head, so I've attempted to help out.
I can't stress enough that I really don't have any experience making something like this, so I thought it would be an interesting challenge. I actually really struggled with cutting the worbla evenly... so much so that I took a detour and resorted to lining the worbla with a soutache ribbon to see if that would force me to keep my lines straight. That plan backfired pretty quickly and I went back to stage one but, if nothing else, I'm finally becoming comfortable wielding scissors.
My friend said she wanted something similar to the simplicity but stature of Galadriel's crown and so I researched my images and got to work. My poor styrofoam head is rather the worse for wear, having been melted by the heat gun too many times and I think it might be about time to pick up a second one, but I still found it manageable. I didn't prime the surface with anything before setting the strips of worbla on top of it, and I think that might have been what salvaged the project: it didn't budge from it's perch atop the mannequin head until I pried it free.
I'm pretty sure I'm teetering on the edge of a ramble here, so I'll just post the pictures. As always, I'll be more than happy to answer any questions that are posted in the comments. That'll mean that someone is reading this, at least :P
Okay. Picture time!


Wednesday, January 28, 2015

Tanto Progress Part 2

Hey there, nonexistent readers! Nah, I know the blog's new and pretty nondescript so far.
Anyway, I've got a few pictures to post on the sword progress, so I figured I'd share them now! Still waiting for the final layers of acrylic to dry on the scabbard before I get to work figuring out the sageo knot and beads and stuff. First, here's my mace all coated in Gesso and my tanto all coated in PlastiDip

I colored the blade using Rub'n'Buff and polished away at it until I was happy with the finish.


I coated the scabbard in red PlastiDip (which is darker and more vibrant than it appears here -- blame my phone's camera flash) and let it dry, then flipped, sprayed and waited some more. I'm actually really happy with the way it turned out!


As I said, I'm waiting for the acrylic on the scabbard to dry. I want it to have a finished, lacquered look before starting on the decorations. If you have a minute, I'd love some feedback or a shout to see if anyone is actually reading this. Have a nice midnight/morning/second breakfast, y'all!

Tuesday, January 20, 2015

Gogo Progress: Tanto

Despite the massive amount of screenglare today, I ventured outside to pick up a new roll of worbla from the awesome guys at Tap Plastics! Seriously, if you're in the area, I highly recommend swinging by. They're friendly, supportive and really helpful.
Ran past Lowes on the way home to pick up a few more supplies and then got to work on the scabbard and haft of Gogo's tanto.
I fitted a thin sheet of EVA foam around the tanto blade I'd already made (see the blog post titled New Project = New Pictures) and cut it so it would fit snugly. Then I used contact cement to fuse the seams of the foam sheet and slid the blade in to make sure it would fit.
I traced the bottom of the foam sheath on a smaller piece of EVA, cut it out and glued it to the end to create a cap. My cutting skills are far from perfect, so I sanded it down a bit with some 80 and then 320 grit sandpaper.
Using the same process as fitting the foam to the blade, I coated the EVA with worbla and then trimmed it and lightly pressed down the seam. I haven't read much about sanding down worbla before it's been primed. This, I assume, is mostly because worbla is heat-reactive and sanding=friction=heat. That could end up a pretty gooey mess. But I tried it anyway, starting with 40 grit and working my way back up to 320. It looks a little chalky in the photo, but I was pleasantly surprised by how well it worked out. It really smoothed out the seam! Please ignore the random styrofoam ball in the picture. I was experimenting.


After the seam was sanded down to my satisfaction, I took some extra worbla scraps (as always, SAVE ALL THE WORBLA!) and molded the kurigata (sheath's loop-thing) and pressed it onto the scabbard. While it was cooling, I cut out a rough piece of EVA foam for the tsuba (handguard) and fitted it haphazardly onto the handle of the blade. I also elongated the handle a little with another square of worbla-coated wood after I realized it looked a little too short.

I'm guessing anyone looking at step-by-step cosplay progress will have come across many more well-known cosplayers and their instructions for how to sandwich foam and worbla, but I'll put it down here on the off chance anyway.
Two pieces of worbla, both glossy side up. Foam in between. Heat them up, line them up, sandwich the foam, cut the worbla where you want the piece to end, and use a needle to puncture any air bubbles. If you do get air bubbles, press them from the outside of the bubble in toward the needle-hole.
Ta da!